Wednesday, August 24, 2016

The One with the Number Line

I realized pretty early on that my students did not have a very strong understanding of fractions.  They did not see fractions as numbers.  They didn’t understand that fractions hold a value. 

I immediately went to Pinterest looking for a hands on activity that would allow my students to discover the connection between all these fractions without my having to tell them.  I kept coming across this pin. 

It needed some changes to work for my students, but isn’t that what we teachers do best? 

I divided my students into groups of 5 to 6.  This gave me 3 to 4 groups in each class. 

I gave each group a piece of calculator tape.  I did not measure these exactly but they were all approximately 80”.  Students measured 5” from each end and drew a vertical line.  This left 5” of empty space on each end.  They then used a meter stick to mark every inch between those two vertical lines creating a number line. 

They then glued their tape paper onto a big piece of bulletin board paper.

Once that was accomplished I asked students to find the half-way point.  They wrote ½ on an index card and glued it in the correct location. 

The next steps was marking the thirds and sixths.

Our goal was to label everything up to twelvths but after four days of working on these I decided my students had gotten all they were going to get from them.  They had gotten more than I had hoped they would.

I was doing a happy dance on the inside as I walked around listening to the conversations my students were having as they tried to determine where the index cards went.  It was a very PROUD moment.  Students discovered on their own that ¼ was half of ½ and 1/8 was half of ¼.  They discovered that 1/6 was half of 1/3.  They realized that when working with unit fractions the number decreased in value as the denominator increased. 

I was a little concerned about the size of the groups, but I also didn’t want 7 pieces of bulletin board paper in each of my 3 classes.  For the most part it worked out quite nicely.  My students worked well together.  I think having the larger groups really helped the conversation that took place. 

This is definitely a project that I will be doing again next year.


Tuesday, August 23, 2016

Which One Doesn't Belong

Have you ever come across an idea that you liked, but you still didn't really give it much thought?

WODB (Which one doesn't belong?) was just that for me.

I vaguely remember hearing about this a couple of years ago.

I had long since forgotten about it until this past summer when it was mentioned in a math conference I attended.

Even then though I didn't fall in love with the idea.

Last week was my first week back with students.  You know the drill - lots of procedure practice & lots of getting to know your students.

I wanted to do a math activity that gave me some insight to their abilities but that didn't stress them about.

After all it was still the first week of school. :)

I decided to try WODB.

The idea is that there are 4 items - you can choose between shapes, numbers, and graphs & equations.

Students determine which item doesn't belong and they must give a reason.

We tried the numbers category last week.

What I love is that there is no one right answer.

Y'all every single student in my class was able to experience success

We started the year on a good note, experiencing success, and building confidence.

Here is an example.


Common answers for this one in my class was that the 9 didn't belong because it didn't have a digit in the tens place and the 16 didn't belong because it was the only even number.

Those are pretty easy and obvious choices in my opinion.

But after some discussion we found deeper reasons for those same two numbers and even came up with reasons why the other two might not belong.

The discussion that was going on in my classroom was seriously impressive.

It made me excited for the year.

There are lots of ways you can use WODB in your classroom.

I gave students 3-4 minutes to decide which number didn't belong and write down their answer along with their reasoning.  I told them their reasoning was the most important part.

Then I gave them a few minutes to discuss their thoughts with their table group.

Finally we discussed as a whole class.


The picture above was our first example.

Students only wrote down one answer.

After our discussion where they realized there are lots of different answers, they wrote down as many answers as they could for the other examples we looked at.

This is definitely something I will continue to use throughout the year.

I hope you and your students will enjoy it too.

If you already use WODB, I would love to hear how you use it.


Friday, August 12, 2016

Organized Grading

How do you keep track of all the papers that need to be graded and that have already been graded?

A few years ago when I was teaching 7th grade I found a system that works for me.

It's very simple.

I think that's what makes it so great for me.

Two file folders for each class and a sharpie to label the folders and you are all set.

I will admit that this year I seriously contemplated trying something different.

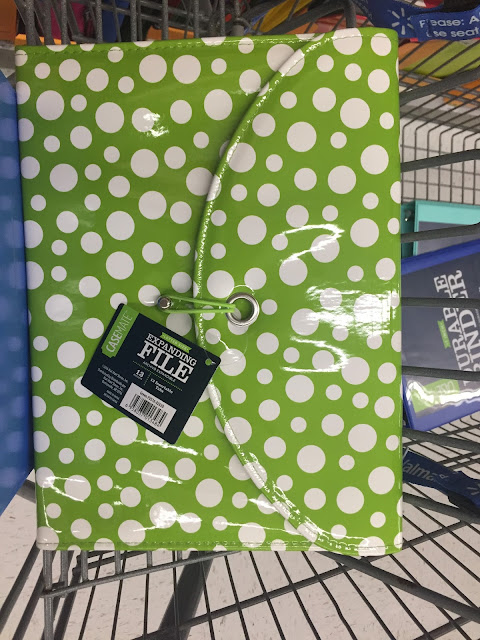
I looked at this for HOURS in Wal-Mart one night.

I even made what was probably too many snapchat stories about it.


Since I plan to use Google Classroom this year and hopefully have fewer papers to keep up with, I ultimately decided to go with my cheaper file folder system.

However, I did up my game this year and purchased some cute folders instead of the solid ones I've used in the past.


There are three different designs but I forgot to take a picture of the other two designs.

I see three different groups of students throughout the day.

And I see each of those groups twice a day - once for math and once for science.


As you can see I have a folder for each homeroom and for each subject.  When my students turn in an assignment, I paperclip the papers together and place them in the appropriate folder.

Once the papers have been graded they are moved to a new folder.

Last year I had six "graded" folders because  I kept the math an science papers separate. 
We send all graded papers home every Monday in our parent communication folders.  Because of that it doesn't really serve any purpose for me to keep them separated once they are graded.

I've just always had two folder for every class - a "two be graded" and a "graded" folder.

And that's it.

Simple.

How do you organize your papers? Leave me a comment letting me know.


Monday, August 1, 2016

Monday Made It - Starting the Countdown

My husband and I recently spent ten days in the Carolinas.  It was a much need vacation.  

Sadly as soon as we got home the countdown began for me.

I've been working in my classroom and getting things ready.

This is my last week of summer vacation.

I return to work next week and the students show up the following week.

I'm ready for it and I'm not.

I'm excited to be back at school with my coworkers and students.

I'm not excited to be reunited with my alarm clock or real clothes before 9AM.

I'm very happy with how my room is coming together.

Today I'm linking up for another fun edition of Monday Made It


I'm loving my desk area this year.


The letters that spell my name on my desk are from School and the City.

My desk is oriented my desk differently this year.  I love it but it left me without a good place to put my toolbox.

So I purchased this little shelf and it works perfectly.


A few Monday Made Its ago I got inspired by Mrs. Heeren to add a fabric garland to my curtains.


I got my crate for make up work all set up.  Students just find the file of the date they missed and grab their make up work.  For example if they miss August 20th, they would look in file marked 20.


And last but not least...my bulletin board.

It's not completely finished.

I still need to add the words "I have a growth mindset"

But I'm pretty proud of it because I HATE bulletin boards.